This menu allows you to create several routes
for the bus trajects.
For example, if you want some bus to go in one way
and the other ones to go the other way, you'll define
2 routes, one for each way.
This menu allows you to create routes that item boxes can follow.
Once a route is defined, right-click an item box and select "Move along route…" to attach it to that route.
This option allows you to replace one of the routes you created by another one.
For example, it could be useful if you created route 2 from route 1, but then you re-edited route 1.
In that case, you might want to apply changes on route 1 to route 2.
This menu allows you to override the course parameters on certain conditions.
It allows you to give more diversity to your arena (decors appearing progressively, falling platforms...)
These changes will be triggered either after a specific time, or when the player enters a specific zone.
This menu allows you to change the type of an off-road a posteriori.
For example, if you have indicated a "grass" off-road
and you want to change it to "water", just do it here.
Define here positions where karts will start the game.
First click on the map to indicate the start location of player 1.
An arrow appears, it indicates the starting direction.
Click on the end of the arrow to change that direction.
Click on the map again to set the location of player 2, and so on.
You must enter 8 positions for the 8 players.
To change a player's position a posteriori, right-click on the end of the arrow.
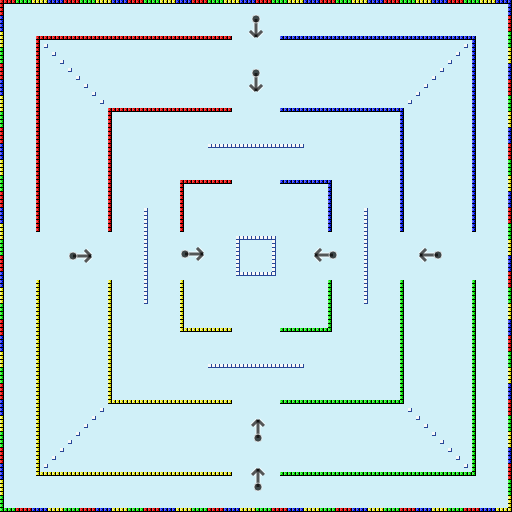
Indicate here different possible routes takable by CPUs.
Click to add a point, then click successively on 2 points to link them.
At the beginning, CPUs wiil move to the nearest point in front of them.
When they reach it, they wiil randomly go to one of its linked point, and so on.
Walls are areas of the arena where karts cannot pass.
You have 2 options to define a wall: rectangle
or polygon
Rectangle: click once to define one of the corners of the rectangle, then a second time to define the opposite corner.
Polygon: click to draw the first point, then click again to draw the next point, and so on. When you have finished, click on the first point to close the polygon.
Once the wall area has been defined, you can modify or delete it by right clicking on it.
Off-roads are places of the arena in which the karts are slowed down: grass, water, etc.
You select the type of off-track from the drop-down list on the right menu.
As for walls, you can then define off-road areas by rectangles or polygons.
Holes are the areas where the karts that move over it fall and are replaced: void, lava, water...
To define a hole, you thus need to specify 2 information: hole area, and respawn position.
Hole area: as for walls, you can define the area by a rectangle or by a polygon.
Respawn position: click where you want the kart to land.
An arrow appears: it indicates the direction of respawn.
Click on the point at the end of the arrow to change that direction.
Note that a right click on that same point let you move the arrow.
Here you define the positions of the item boxes of the arena.
Just click anywhere on the map of your choice to place an item there.
Indicate here the jumps, that is to say the areas that give instant height to the karts that roll on it.
You define a jump box by a rectangle.
The height of the jump is calculated automatically from the size of the area (the larger the area, the higher the karts will jump).
However, you can override this jump height yourself by right-clicking on it and selecting "Jump height".
Indicate here the boosts, that is to say the areas that give instant speed to karts.
To set the location of a boost, simply click on the desired location in the map.
By default, a boost is of size 8×8. You can change this size in the right menu.
Cannons are areas that quickly transport you from one point to another on the circuit.
To define a cannons, you specify 2 information: cannon area, and replacement area.
Canon area: as for the walls,
you can define the area by a rectangle or by a polygon.
Replacement area: Click where you want the kart to be transported.
A Teleporter is an area that moves you to another place when you go over it.
You define them the same way you define holes: with a teleporter area, and a destination point
The "Mobile floor" tool allows to define the areas of the circuit where the kart is driven in one direction: conveyor belt, turntable, water stream...
To define a mobile floor, you specify 2 information: the mobile area, and the direction where the kart is being pushed.
Mobile area: there are 3 possible shapes; rectangle, polygon and circle.
Rectangle and polygon allow to define a translating area, circle define a rotating area.
Pusing direction: once area entered, an arrow appears. Place this arrow in the desired direction and force. The larger the arrow, the stronger the pushing force.
The "Elevator" tool allows to define areas where you can gain instant altitude.
For example, if you have a wall of height 1 and you want to make it climbable from the floor, you can define an elevator zone of 0→1 in front of the wall.
To define an elevator, you can specify 3 information: the elevator area, the height you'll obtain once you're on it, and optionally the minimum height for the elevator to be enabled.
The decor are the objects or mobs that you encounter on the map: thwomps, pipes, ...
You select the type of decor in the menu on the right.
Click on the map location of your choice to place a decor in that location.
Introduced in Mario Kart World, rails are areas where karts follow a predefined path while being able to trick to gain speed.
You define them the same way you define CPUs route: with a path delimited by nodes.
Once you finished drawing the path, click on any node to validate. Then you can define some additional properties by right clicking on it:
Rail height: minimum altitude required to start riding it (default = 0)
Target height: altitude of the kart once on the rail (default = rail height). Works like elevators, specify this value if the rail goes over a wall for example.
Define here various options:
Background image: this is the image displayed behind the arena (on the horizon).
Out color: sets the color displayed around the arena image.
Image: change the image of the arena, or resize / rotate it.
Allows you to indicate the scenery image that will be displayed behind the arena (on the horizon).
Just click on the background image of your choice.
Choose the music of the type of arena that will be played during the race (if enabled in the options).
You can set an original music by selecting the associated arena, or any music from Youtube.
For the latter option, simply enter the address of the desired Youtube video.
This address looks like this: https://www.youtube.com/watch?v=f6nylHp39JE
Sets the color displayed outside the arena (around the arena image).
Simply select the color in the proposed color gradient.
To have a different gradient, move the cursor at the top.
Once the color is selected, click on "Ok". To cancel, press Esc.
If you want to edit, resize, or rotate the arena image, you can do it in this menu.
Change the arena image: select the new image from your hard drive, and click on "Validate".
Resize the image: enter the new desired dimensions and click on "Validate".
Rotate / flip the image: click on the desired option and click on "Validate".
In the second and third case, in addition to the image, the various parameters of the arena (starting position, walls, etc.) are also modified to adapt to the transformation.

") 100%
100%")